19.1kW Solar with Tesla Powerwall — Part 1
Part one of a massive 19.1kW solar installation in Seamer near Stokesley. This three-part series documents one of our largest residential projects featuring 44 Jinko Tiger Neo 435W panels, dual SolarEdge 6KW optimised inverters, and a Tesla Powerwall battery.
Full Installation Walkthrough
This is the first part of a three-part series documenting one of the largest and most complex residential solar installations we have undertaken. The property, located in Seamer near Stokesley on the edge of the North Yorkshire Moors, is a substantial detached house with extensive roof space across multiple elevations. The homeowner had ambitious goals: maximum solar generation, significant battery storage with Tesla Powerwall technology, and a system designed to minimise grid dependence for decades to come.
The project began with an extensive site survey that took the better part of a full day. We used drone imagery to map the entire roof layout, identifying usable areas on the south-facing main roof, the east-facing wing and the west-facing garage extension. Shading analysis revealed that the south face was completely unobstructed throughout the year, while the east and west faces would experience minor shading in early morning and late evening respectively, which we accounted for in the system design using SolarEdge power optimisers.
The final design specified 44 Jinko Tiger Neo 435W panels delivering a total system capacity of 19.14KW. This is an exceptionally large residential array that required a G99 application to Northern Powergrid, as any system over 3.68KW per phase needs formal approval from the Distribution Network Operator before it can be connected. We submitted the G99 application well in advance of the installation date to ensure approval was in place before our team arrived on site.
Two SolarEdge 6KW inverters were specified for this project rather than a single larger inverter. The SolarEdge platform was chosen because it uses DC optimisers on every individual panel, which means each panel operates at its own maximum power point independently. This is critical on a multi-orientation roof like this property because panels on different faces receive different amounts of sunlight at different times of day, and without individual optimisation, the lower-performing panels would drag down the output of the entire string.
Scaffolding for this project was a significant undertaking in itself. The scaffold company required two days to erect the full perimeter scaffold around the house and garage, with additional internal scaffold platforms on the higher roof sections. Safety is always our top priority, and on a project of this scale, comprehensive scaffold coverage is essential to give our installation team safe and efficient access to every part of the roof.
In part one of this video series, we focus on the roof work: the installation of the mounting system and the 44 solar panels across the three roof faces. Our team began on the south-facing main roof, which would carry the largest share of the array with 20 panels arranged in a four-by-five landscape configuration. Each roof hook was carefully positioned over a rafter centre and secured with stainless steel coach screws, with a slate-compatible flashing kit ensuring a completely weathertight seal at every penetration point.
The mounting rails were levelled using the adjustable height feature on the roof hooks, creating a perfectly flat installation plane despite the natural undulations in the roof surface beneath. This process requires patience and precision, but it is what separates a professional installation from an amateur one. When the panels are all fitted, the array should look like a single uniform surface with consistent spacing between each module.
Once the south-facing array was complete, the team moved to the east wing where 14 panels were installed in a two-row configuration. The cable routing on this section was more complex due to the ridge line between the two roof faces, and we used weatherproof junction boxes at the ridge to make clean transitions between the DC cabling runs from each face.
The final 10 panels were installed on the west-facing garage extension, completing the 44-panel array. By the end of the roof installation phase, the property had an impressive 19.14KW of solar capacity spread across three orientations, ensuring strong generation from sunrise through to sunset throughout the year. The multi-orientation design is actually advantageous for self-consumption because it spreads the generation profile across a wider portion of the day, rather than concentrating it all in a narrow peak around solar noon.
With all panels mechanically installed and the DC wiring terminated at the designated entry point into the property, part one of the installation was complete. The next phase would cover the internal electrical work, inverter installation, Tesla Powerwall integration and the complex consumer unit modifications required to bring a system of this scale online safely and in full compliance with all regulations.
Project Specifications
| Category | Tesla + Solar |
| Location | Seamer, Stokesley |
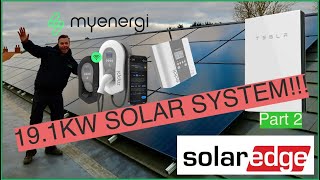
| Specs | 44x Jinko Tiger Neo 435w, 2x SolarEdge 6KW |
| Duration | 18:00 |
Equipment Used
Jinko Solar
44x Tiger Neo 435W panels
SolarEdge
2x 6KW Optimised Inverters
SolarEdge
44x Power Optimisers
Tesla Powerwall
13.5kWh Battery
MyEnergi Zappi
EV Charger
MyEnergi Eddi
Hot Water Diverter
Video Chapters
Want a Similar System?
Get a free, no-obligation quote for a bespoke installation tailored to your property.
Get a Free QuoteOr call 01642 790 489


Interested in This Type of Installation?
Fill in the form and our team will get back to you within 24 hours with a free, no-obligation quote tailored to your property and energy needs.
Get a Free Quote
Responds in <2hrsAreas ALPS Electrical cover
Award-winning, MCS & NAPIT-certified solar, battery, EV & electrical installers across Teesside, County Durham & North Yorkshire — including solar panel installers Middlesbrough, solar panel installation Stockton-on-Tees, solar panels Darlington, solar panel installers Hartlepool, solar panel installation Durham, solar panels Redcar, solar panel installers Yarm, solar panel installation Ripon and solar panels Northallerton. Free surveys, 500+ five-star reviews, Tesla-Certified.